Why Knowing the Process Matters
A kitchen remodel is one of the biggest investments you can make in your home. It's exciting, but it can also feel overwhelming — especially if you've never been through a major renovation before. What happens after you sign the contract? When does demolition start? How long will you be without a working sink?
Understanding what to expect at each stage takes the mystery out of the process and helps you plan your daily life around the work. Whether you're upgrading a dated galley kitchen or transforming your space with new cabinetry and countertops, here's a realistic look at what happens during a kitchen remodel in Fort Lauderdale — from the first consultation to the final walkthrough.
Step 1: Initial Consultation and Design Planning
Every successful kitchen remodel starts with a conversation. During the initial consultation, your contractor visits your home to assess the current layout, discuss your goals, and understand your budget. This is the time to share inspiration photos, talk about how you use your kitchen, and ask questions about materials, timelines, and costs.
After the consultation, the design phase begins. Depending on the scope of your project, this might include:
- Detailed floor plans and layout options
- Cabinet style and finish selections
- Countertop material choices
- Fixture and appliance placement
- Lighting design
This phase can take anywhere from one to four weeks, depending on how quickly decisions are made. It's worth taking your time here — good planning prevents costly changes later.
Step 2: Permits and Pre-Construction Prep
In Fort Lauderdale, most kitchen remodels that involve structural changes, electrical work, or plumbing modifications require building permits. Your contractor should handle the permit application process on your behalf, ensuring everything meets local building codes and passes inspection.
While permits are being processed, this is a great time to:
- Set up a temporary kitchen area (a folding table, microwave, and coffee maker go a long way)
- Clear out your existing kitchen — empty cabinets, remove fragile items, and protect nearby furniture
- Confirm material orders and delivery dates with your contractor
Permit timelines vary, but in Broward County, homeowners should expect anywhere from a few days to a couple of weeks for approval.
Step 3: Demolition
This is where things get real. Demolition day is loud, dusty, and surprisingly fast. Your contractor's crew will remove old cabinets, countertops, flooring, backsplash, and sometimes walls. If your remodel involves changing the layout, this is when that transformation begins to take shape.
A professional team will protect the rest of your home during demolition by sealing off doorways with plastic sheeting and using dust containment systems. Expect this phase to last one to three days for a standard kitchen remodel.
What About Asbestos or Hidden Damage?
Older Fort Lauderdale homes — particularly those built before the 1980s — may have asbestos in flooring or insulation, or hidden water damage behind walls. A reputable contractor will know how to identify these issues and address them safely before moving forward.
Step 4: Rough-In Work (Plumbing, Electrical, and Framing)
Once demolition is complete, the behind-the-scenes work begins. This phase is called the "rough-in," and it includes:
- Plumbing: Moving or adding water supply lines and drain pipes to accommodate your new layout
- Electrical: Running new wiring for outlets, lighting, and appliances — including dedicated circuits for items like a dishwasher or range
- Framing: Building or modifying walls, soffits, or structural supports
This stage typically requires inspections from the city before work can continue. Your contractor will coordinate these inspections so there are no delays. Rough-in work usually takes three to five days, though inspection scheduling can add a few more.
Step 5: Drywall, Painting, and Prep Surfaces
After the rough-in passes inspection, walls are closed up with new drywall, taped, mudded, and sanded smooth. Once the surfaces are prepped, painting happens — and suddenly, your kitchen starts to look like an actual room again.
This is also when ceiling work, any crown molding prep, and wall texturing are completed. Expect this phase to take about three to five days, including drying time between coats.
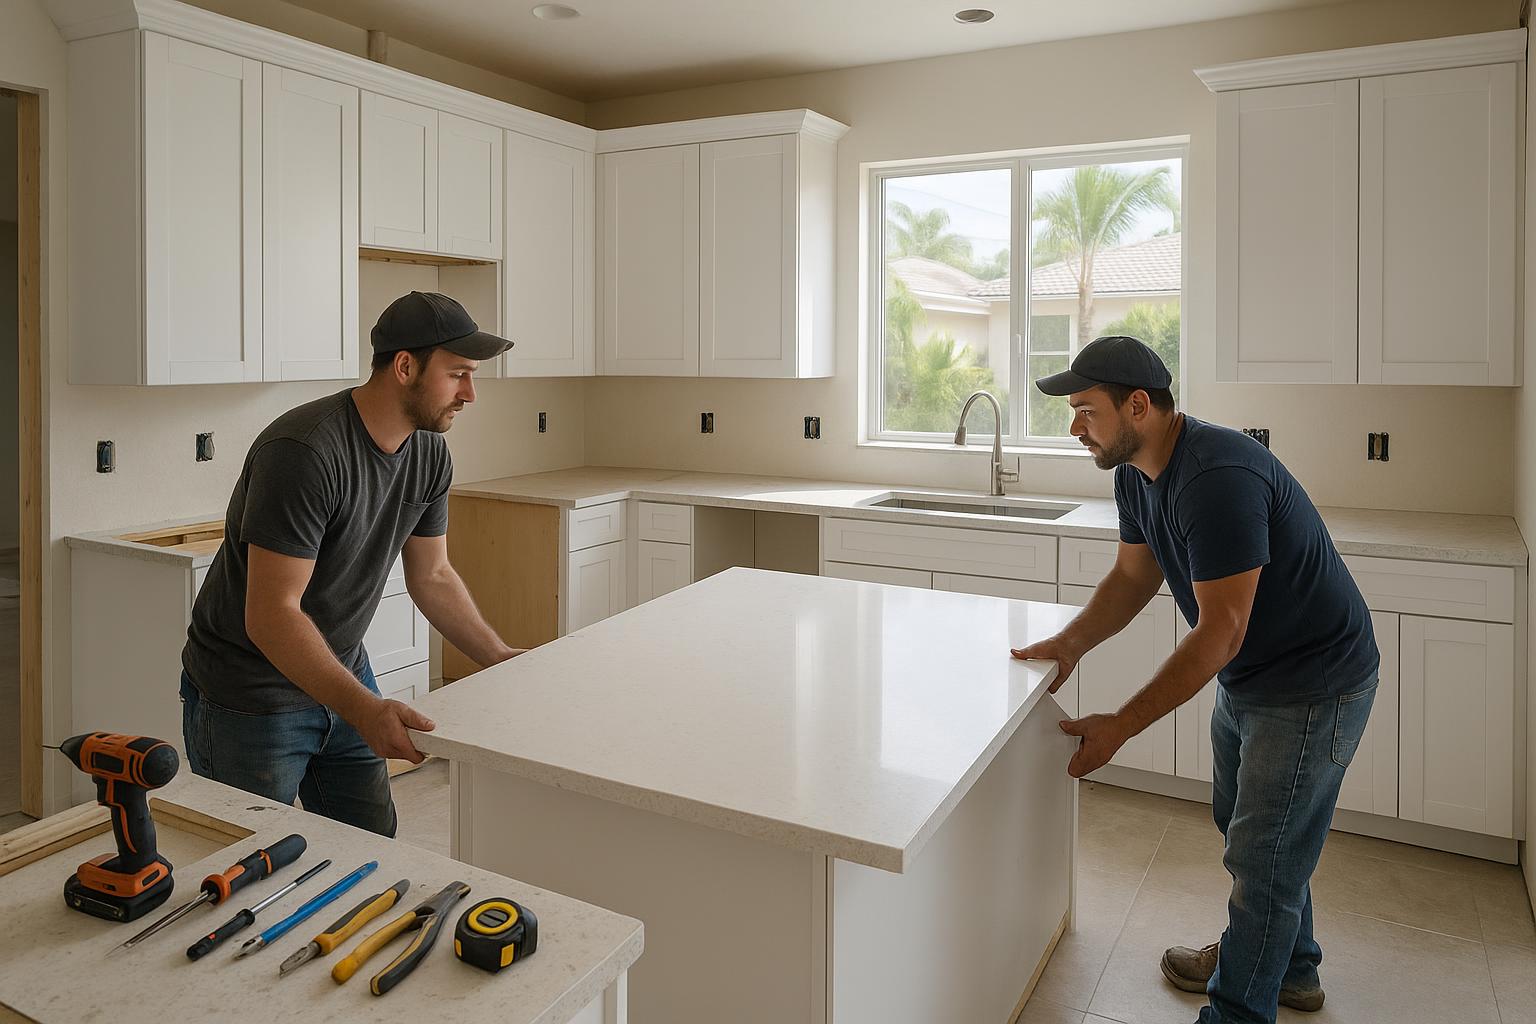
Step 6: Cabinet and Countertop Installation
Cabinet installation is one of the most exciting milestones in a kitchen remodel. This is when the design you chose weeks ago starts coming to life. Professional installers carefully level and secure each cabinet, ensuring doors align perfectly and drawers glide smoothly.
After cabinets are in place, countertop fabricators typically come to do a final template measurement. The actual countertop installation usually happens a week or two later, depending on the material. Granite, quartz, and marble slabs are custom-cut to fit your exact layout.
This combined phase generally takes one to two weeks, with a gap between cabinet install and countertop delivery.
Step 7: Flooring and Tile Work
Depending on your project plan, flooring may be installed before or after cabinets — your contractor will determine the best sequence based on the materials you've chosen. Tile backsplashes are typically installed after countertops are in place so the tile meets the counter edge cleanly.
For Fort Lauderdale homes, popular flooring choices include porcelain tile, luxury vinyl plank, and natural stone — all of which hold up well in our humid climate. Tile and flooring installation usually takes two to four days.
Step 8: Fixtures, Appliances, and Final Connections
Now comes the stage where everything gets connected and your kitchen becomes functional again. This includes:
- Sink and faucet installation
- Appliance delivery and hookup
- Light fixture and under-cabinet lighting installation
- Outlet covers, switch plates, and hardware
- Final plumbing and electrical connections
This phase typically takes two to three days. It's the home stretch, and every small detail matters.
Step 9: Final Walkthrough and Punch List
Before your contractor calls the job complete, you'll do a final walkthrough together. This is your chance to inspect every detail — check cabinet doors, test every outlet, run the faucet, open and close drawers, and look at grout lines and paint edges up close.
Any small items that need attention go on a "punch list," which your contractor addresses promptly. A good contractor welcomes this process because they want you to be completely satisfied.
Tips for Surviving Your Kitchen Remodel
Living through a kitchen renovation takes patience, but a little preparation makes it much easier:
- Set up a temporary kitchen in another room with a microwave, toaster oven, and mini fridge
- Plan easy meals or budget for dining out more often during the project
- Communicate regularly with your contractor — don't hesitate to ask for updates
- Make decisions early to avoid delays caused by backordered materials
- Be flexible — unexpected issues can arise, especially in older homes
Ready to Start Your Kitchen Remodel?
At Peak Foundation Contractors, we guide Fort Lauderdale homeowners through every step of the kitchen remodeling process — from initial design to final walkthrough. We believe that when you understand what's happening and why, the entire experience becomes less stressful and more enjoyable. If you're considering a kitchen renovation, reach out to our team for a consultation. We'll walk you through what to expect for your specific home and help you build the kitchen you've been dreaming about.